
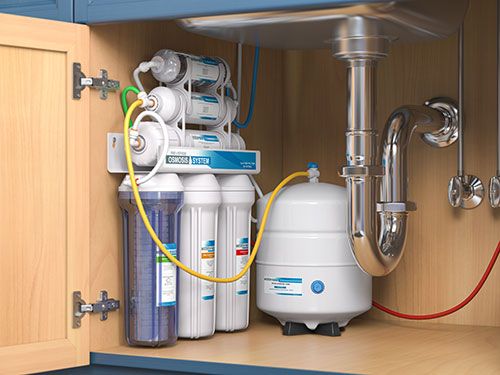
Reverse osmosis membranes do not last forever. Even in a well-run plant, the polymer slowly ages, deposits accumulate, and performance drifts. Replacing membranes too early wastes money, while running them too long drives up energy costs, degrades water quality, and risks damage to the rest of the system. The key is knowing what to expect and recognizing the signs that replacement is due.
This guide explains typical membrane lifespans, the factors that shorten or extend them, how to tell when a membrane has reached the end of its useful life, and how to plan replacement.
How Long Do RO Membranes Last?
There is no single answer, because lifespan depends on the application and how the plant is managed. As a general guide:
- Brackish water RO membranes commonly last about 3–5 years, and well-run plants with good feed water can reach 7 years or more.
- Seawater RO membranes often last about 5–7 years, and many large plants report 7–10 years with excellent pretreatment and operation.
- Wastewater and industrial reuse systems, with difficult feed, typically see shorter lifespans of 2–4 years.
- Small domestic and light commercial units vary widely, from 2–5 years, depending on feed quality and maintenance.
Manufacturers often design systems on the assumption of a membrane life of about 3 years for performance guarantees, although many plants far exceed it. Treat these figures as ranges, not promises. A plant fed with clean water and cleaned on time can outlast the average by years, while a plant that is neglected may need new membranes within a year.
Why Membranes Age: The Main Causes of Performance Loss
1. Fouling and scaling
Deposits of particles, organics, biofilm, iron, and mineral scale reduce flow and raise pressure. Most fouling can be reversed by cleaning, but repeated or heavy fouling, and aggressive cleanings, leave residual damage over time.
2. Chemical damage
Polyamide thin-film composite membranes are very sensitive to oxidants. Exposure to free chlorine, chloramines, ozone, or other oxidizing agents breaks down the membrane polymer and causes a permanent loss of salt rejection. Damage is cumulative: manufacturers often quote a tolerance of a few hundred to about a thousand ppm-hours of free chlorine exposure at neutral pH, and the presence of iron or other metals can accelerate degradation. Cleaning outside the permitted pH and temperature limits can also harm the membrane.
3. Mechanical damage
High-pressure surges, water hammer, rapid start-up and shut-down, backpressure on the permeate side, and operation above the pressure rating can crush or delaminate the membrane or cause telescoping (the element sliding out of shape under high differential pressure). Abrasive particles from the feed, such as sand or carbon fines, can scratch the surface.
4. Compaction
Years of operation at high pressure and temperature slowly compress the membrane structure, reducing permeability. It is a normal ageing effect and is more marked at higher pressures.
5. Biological growth
Bacteria multiply in the feed channel and on the membrane. A bad biofilm is difficult to remove and often returns quickly after cleaning, which shortens the cleaning interval and damages the membrane over time.
6. Poor storage and shutdown practice
Membranes left dry, or left stagnant without preservation, can dry out or grow biological contamination. Elements that are stored must be preserved correctly, typically in a food-grade preservative such as sodium metabisulfite solution, and the preservative should be renewed on the manufacturer’s schedule.
Factors That Extend Membrane Life
- Appropriate pretreatment that matches the feed water, with low SDI and turbidity
- Complete dechlorination with an oxidant monitor (ORP) as protection
- Correct antiscalant and pH control
- Conservative recovery and flux within manufacturer limits
- Prompt, correct cleaning when normalized data reach the trigger point
- Gentle starts and stops with controlled pressure ramps
- Flushing on shutdown to reduce stagnation and scaling
- Regular cartridge filter replacement
- Detailed record keeping and normalization of data
- Trained operators and written operating procedures
Investing in these practices is usually far cheaper than the cost of premature replacement.
Signs That It May Be Time to Replace Membranes
Replacement is usually considered when one or more of the following occurs after proper cleaning and checking of other plant components.
- Normalized permeate flow stays low. If cleaning no longer restores flow to within about 15–20% of the start-up value, the membrane has probably lost permeability permanently.
- Salt passage has increased significantly. If normalized salt passage has doubled, or the product no longer meets the required quality even after cleaning, the membrane has probably been damaged by oxidation, abrasion, or ageing.
- Differential pressure remains high. A persistent increase of 15–20% or more after cleaning suggests irreversible fouling or physical damage to the feed spacers.
- Cleaning frequency keeps increasing. If you need to clean every few weeks, or the performance falls rapidly after each clean, the cost of chemicals, downtime, and energy may soon exceed the cost of new membranes.
- Energy use has risen out of proportion. Compare specific energy (kWh/m³) to the baseline. If the plant needs far more pressure than at start-up, replacement may pay for itself.
- Physical damage is visible, such as telescoping, cracks, leaks, or broken end caps.
- Water quality failures keep recurring, such as high conductivity, taste problems or microbiological issues.
No single symptom is conclusive, and the cause should be investigated first. A sudden jump in salt passage, for example, may point to a leaking O-ring, a damaged interconnector or a faulty instrument, not a failed membrane.
Diagnosing Before You Decide
Before ordering new elements, confirm that the problem lies in the membranes.
- Check instruments: calibrate conductivity meters, pressure gauges, and flow meters.
- Inspect seals and hardware: O-rings, brine seals and adapters.
- Review the normalized data to identify when and where the decline occurred.
- Perform a probe test to find which vessel or element is leaking by inserting a probe tube into the permeate port and measuring conductivity along the length of the vessel.
- Carry out a vacuum decay or pressure test for integrity, where the system allows.
- Check the cleaning history for incorrect chemicals, pH, or temperature.
- Examine an element or request an autopsy for definitive identification of foulants or damage.
Sometimes only a few elements are damaged, and replacing them is sufficient.
Full or Partial Replacement?
- Full replacement is common when all elements show similar ageing, or when the plant has been in service for many years, and it gives a fresh baseline and consistent performance.
- Partial replacement (for instance, only the first-stage lead elements, which suffer the most fouling, or only the damaged vessels) can save money. Replacing lead elements and moving older ones back is a common strategy in multi-stage systems.
- Mixing old and new elements in the same vessel is generally discouraged, since differences in permeability and age can cause imbalance. If it must be done, follow the manufacturer’s advice.
- Upgrade opportunities: replacement is a chance to switch to a newer, lower-energy or higher-rejection membrane that fits the same vessels, but confirm compatibility and the system’s hydraulic limits first.
Planning and Budgeting for Replacement
Treat membranes as a planned operating cost, not an emergency expense.
- Estimate the life based on your own data, not only on the nominal figure.
- Set aside a replacement fund in the maintenance budget.
- Track trends and forecast when the performance limits will be reached, so that you can place the order in time.
- Keep a few spare elements for critical plants where downtime is costly.
- Order from reputable suppliers, with genuine, properly stored elements, and keep the original packaging until installation.
- Compare the total cost of continuing with the old membranes (extra energy, chemicals, downtime, and lost production) with the cost of new ones.
Installing New Membranes Correctly
Good installation protects your investment.
- Flush the pretreatment and pipework before loading, so that debris does not reach the new elements.
- Handle elements carefully, keeping them wet, avoiding drops and following the loading direction (feed end first).
- Lubricate seals with a suitable lubricant, such as glycerine or silicone-free products recommended by the manufacturer. Do not use petroleum jelly.
- Check that the adapters, interconnectors, and O-rings are in good condition.
- Start up slowly, with a controlled ramp of pressure and flow, and flush the preservative to drain until the conductivity is stable.
- Record the baseline data after a short stabilization period to use for future normalization.
Disposal and Sustainability
Used membranes are generally disposed of as solid waste, but some can be recycled or repurposed, for example by reprocessing into lower-grade membranes. Ask suppliers about take-back or recycling schemes, and check local regulations, especially if the membranes treated hazardous feed. Extending membrane life through good operation is also the most effective way to reduce waste.
Conclusion
RO membranes typically serve for several years, from about 3–5 in many brackish systems to 5–10 in well-run seawater plants, but their actual life is determined by how the plant is designed and operated. Strong pretreatment, protection from oxidants, sensible recovery, timely cleaning, and good records are the best ways to extend life. When cleaning can no longer restore flow and quality, when salt passage keeps climbing, or when energy and cleaning costs outweigh the price of new elements, replacement is the right choice. Diagnose first, replace what is needed, install carefully, and use the new baseline to keep the next set of membranes working for as long as possible.
