
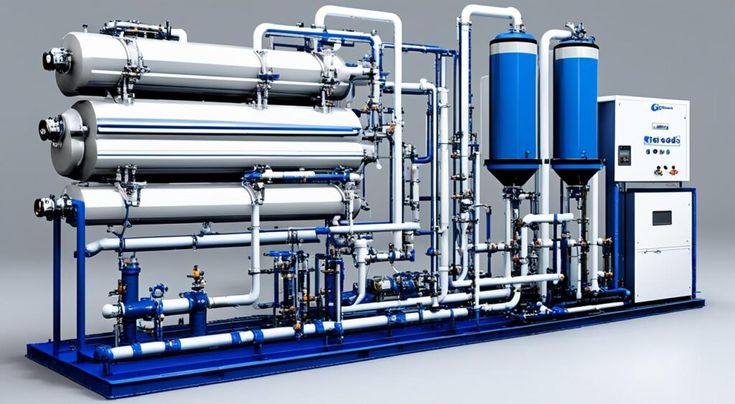
Every reverse osmosis (RO) plant, no matter how well designed, will eventually accumulate deposits on its membrane surfaces. Mineral scale, silt, organic matter, and bacterial slime slowly build up, and the plant responds by producing less water, using more energy, and letting more salt through. The standard remedy is a chemical Clean-in-Place (CIP) procedure, in which cleaning solutions are circulated through the membrane vessels without removing the elements from the plant.
Done correctly, CIP can restore most of the lost performance and add years to membrane life. Done badly, it can drive foulants deeper into the membrane, damage the polyamide layer, and shorten life instead. This guide explains when to clean, which chemicals to choose, and how to carry out a safe, effective CIP.
What Is a CIP and Why Does It Matter?
A CIP is a controlled, low-pressure chemical wash. A dedicated cleaning skid, consisting of a tank, a low-pressure pump, a cartridge filter, a heater, and the pipework to connect them, circulates a cleaning solution through the membrane array and back to the tank. The aim is to dissolve or detach deposits so that they can be flushed out.
Membranes are the most expensive consumable in a plant, and a fouled membrane wastes money every hour it runs. As deposits accumulate, feed pressure must rise to hold output, which increases electricity use. At the same time, salt passage climbs and product water quality drops. A well-timed CIP interrupts this decline and protects the investment.
When Should You Clean? The Trigger Points
The most common mistake in RO operation is waiting too long. Membrane manufacturers generally recommend cleaning when one or more of the following changes occur, measured against the start-up baseline and corrected for temperature and pressure (a process called normalization):
- A drop of about 10–15% in normalized permeate flow
- An increase of about 10–15% in normalized salt passage
- An increase of about 15% in the pressure drop between feed and concentrate (differential pressure)
- Scheduled cleaning intervals, where previous experience shows they are needed
Raw readings are misleading because temperature and feed salinity change through the year. A plant can look stable while actually fouling, or look worse in cold weather when the membrane is perfectly healthy. Keep daily logs and use normalization software or a spreadsheet so that real fouling is visible early. Cleaning at the first trigger point removes thin, fresh deposits that dissolve easily. Deposits left for months harden, cement together, and become much harder to remove.
Diagnose Before You Choose a Chemical
Cleaning chemicals are not interchangeable. The right choice depends on what is actually on the membrane. Before cleaning, identify the likely foulant using the operating data, the feed water analysis and, if possible, an autopsy or a cleaning test on a single element.
- Inorganic scale (calcium carbonate, calcium sulfate, barium and strontium sulfate, silica): typically shows rising salt passage and pressure drop, mostly in the last stage where the concentrate is strongest.
- Metal oxides (iron, manganese, aluminium): often show reddish-brown deposits and a fall in flow, usually in the first stage.
- Colloidal and particulate fouling: shows rapid pressure drop increase in the lead elements, linked to high silt density index (SDI) or turbidity.
- Organic fouling and biofouling: show rising differential pressure across the whole array, slimy feel, and a rapid return of fouling after cleaning.
Because acid and alkaline cleaners do different jobs, the usual rule is to match the first cleaning step to the dominant foulant. For carbonate scale or iron, start with a low-pH acid clean. For organics and biofilm, start with a high-pH alkaline clean. Starting with the wrong one can set the deposit in place; for example, a high-pH wash can make some calcium scale and silica more difficult to remove.
Choosing Cleaning Chemicals
Most plants use a short list of well-proven cleaners:
- Citric acid (typically 2% solution at about pH 2–3): effective against calcium carbonate and iron oxides. It is safer to handle than mineral acids and is the usual first-choice acid.
- Hydrochloric or phosphoric acid (low pH): used for tougher inorganic scale, according to supplier guidance.
- Sodium hydroxide with a surfactant or chelating agent such as EDTA (about pH 11–12): used to remove organic matter, biofilm, and some silica.
- Proprietary blended cleaners: formulated by membrane and chemical suppliers for specific foulants, with built-in surfactants and dispersants.
- Biocides: non-oxidizing biocides, such as DBNPA or isothiazolinones, used to disinfect membranes after cleaning when biofouling is a problem.
Never use chlorine or other oxidizing cleaners on polyamide thin-film composite (TFC) membranes. Even a small exposure causes permanent loss of salt rejection. Always follow the membrane manufacturer’s limits on pH, temperature, and contact time, because exceeding them voids warranties and can damage the membrane.
Preparing for the Cleaning
Good preparation saves time and prevents mistakes.
- Record the baseline. Note flows, pressures, conductivity, and temperature before cleaning, so you can measure the improvement afterwards.
- Prepare the cleaning solution in the CIP tank using clean, chlorine-free water. Good-quality RO permeate is ideal. Add the chemical slowly while mixing and check the pH.
- Adjust the temperature. Warm solutions clean more effectively, but keep within the membrane’s limits. Most polyamide membranes tolerate about 35–45 °C depending on pH, with a lower limit at high pH. Never exceed the supplier’s figure.
- Check pipework and valves so that the cleaning solution flows only where intended and cannot reach the product line directly.
- Wear proper PPE: goggles, face shield, gloves, apron and boots. Make sure an eyewash station and spill kit are available.
- Confirm neutralization and disposal arrangements for the used solution before you start.
The CIP Procedure Step by Step
The exact figures vary between membrane models, so always check the manufacturer’s cleaning guide. The sequence below reflects accepted industry practice.
- Flush the system. Stop the plant and flush the membranes with low-chlorine permeate or good-quality water to displace feed and concentrate.
- Pump the cleaning solution at low pressure. Start with the solution going to drain for the first few minutes to push out the water already in the vessels, then switch to recirculation. Keep the pressure low (just enough to move the liquid) so that no permeate is produced and the foulants are not forced back into the membrane.
- Set the correct flow rate. For 4-inch elements, a flow of around 8–10 gpm (roughly 2 m³/h) per vessel is typical, while 8-inch elements usually need around 30–40 gpm (about 7–9 m³/h) per vessel. Use the manufacturer’s recommended value, since turbulent flow is what scrubs the surface.
- Recirculate for 30–60 minutes. Monitor the pH. If it drifts by more than half a unit, adjust it back to the target range and add fresh chemical if needed.
- Soak. Stop the pump and let the membranes soak for 1–2 hours, sometimes longer for heavy fouling. Warm solutions and extended soaks improve removal.
- Recirculate again for a further 15–30 minutes, then send the dirty solution to drain or neutralization.
- Rinse thoroughly. Flush with clean permeate or filtered, dechlorinated water until the pH and conductivity of the drain water return to near the feed values. Never start a second cleaning chemical before removing the first.
- Repeat with the second chemical if the plan calls for a two-step (acid then alkaline, or alkaline then acid) clean.
- Return to service. Start the plant and send the product water to drain until the conductivity drops to normal. This can take from several minutes to an hour or more.
If the plant has several stages, clean each stage separately where possible. Cleaning them in series pushes the heavy deposits from the first stage into the second, which can hurt the later elements.
Common Mistakes to Avoid
- Waiting until performance has fallen by 30% or more before cleaning
- Using high pressure during recirculation
- Cleaning at the wrong pH for the foulant
- Mixing incompatible chemicals, such as acids with chlorine-based products, which can release dangerous gases
- Skipping the post-cleaning rinse
- Poor record keeping, which makes it impossible to judge whether the cleaning worked
- Repeating cleanings monthly without fixing the root cause
A plant that needs cleaning every month is signalling a problem upstream: inadequate pretreatment, wrong antiscalant dose, excessive recovery or a contaminated feed.
Evaluating Results and Planning Next Steps
After the CIP, compare the new normalized data with your baseline. A successful clean usually restores normalized flow to within 5–10% of the start-up value and brings salt passage back close to normal. If it does not, repeat with a longer soak, a higher temperature within limits, or a different chemical, or consider whether the damage is irreversible.
Long-term, the best cleaning strategy is prevention: adequate pretreatment, correct antiscalant dosing, controlled recovery, and regular monitoring of SDI, turbidity, pH, and chlorine residual. Frequent, small deteriorations cost less than occasional dramatic failures.
Safety, Environmental and Documentation Requirements
Cleaning chemicals are hazardous. Store acids and alkalis separately, label every container, and provide safety data sheets. Spent cleaning solutions must be neutralized to a safe pH (generally around 6–9) before discharge, and the disposal route should comply with local regulations. In Kenya, effluent discharge is regulated under the Environmental Management and Co-ordination (Water Quality) Regulations, so confirm your obligations with NEMA and your local water authority. Keep a CIP logbook recording the date, reason, chemicals, concentrations, pH, temperature, times, and before-and-after performance. This record is invaluable for troubleshooting and for supporting warranty claims.
Conclusion
A disciplined CIP procedure is one of the cheapest ways to protect an RO plant. Clean early, identify the foulant before choosing a chemical, stay within pH and temperature limits, keep pressure low, rinse thoroughly, and document everything. When cleaning stops restoring performance, or becomes necessary too often, treat that as a signal to investigate the cause and, if necessary, to review the plant design or replace worn membranes. With the right procedure and records, most plants can maintain stable output and water quality for many years.
