
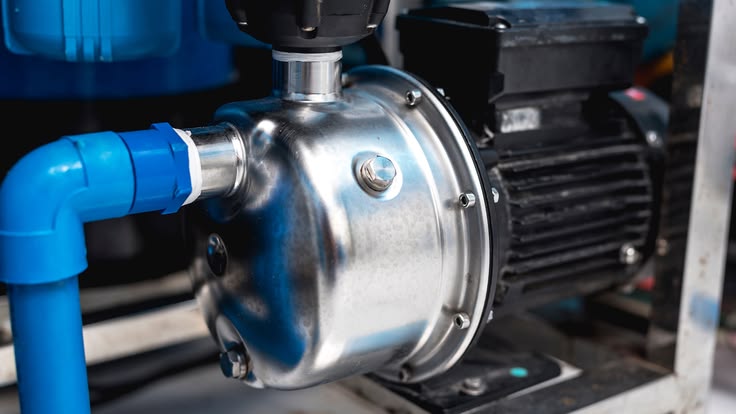
Weak showers on upper floors, taps that trickle in the evening peak and sprinklers that barely reach the lawn are all signs of one problem: water is available, but pressure is not. A booster pump solves this by raising pressure in an existing supply, whether from a municipal main, a storage tank or a borehole. In apartment blocks, hotels, hospitals, offices and housing estates, a well-designed booster set is what makes water supply feel reliable.
This guide covers how booster systems work, how to size and select them and how to install them properly, so they deliver steady pressure without noise, wasted energy or early failures.
What a Booster Pump System Does
A booster pump does not create water. It increases the pressure of water that is already available. The system draws water from a source, such as a ground-level or underground tank, and delivers it at a controlled pressure to the building or estate network.
The target is a stable pressure at every outlet, even at peak demand, without pressure so high that it damages fittings or causes leaks. Most building services aim for a minimum residual pressure of around 1.5 to 2 bar at the highest, most remote fixture, and a maximum of around 5 to 6 bar at the lowest fixtures, although exact requirements depend on local regulations and design standards.
Common Booster System Configurations
Direct boosting from the mains. The pump draws water directly from the utility supply. This is efficient but often restricted or prohibited, because it can reduce pressure for neighbours and risk backflow contamination. Where allowed, it usually requires approval, backflow prevention and low-pressure cut-off protection.
Boosting from a break tank. Water from the mains or borehole fills a storage tank, and the booster draws from the tank. This is the most common and most robust arrangement. The tank buffers supply variations, protects the pump against low mains pressure and provides emergency storage.
Variable speed booster sets. These use a variable frequency drive (VFD) to adjust pump speed to maintain constant pressure as demand changes. They save energy at partial load, reduce pressure surges and cut wear from frequent starting.
Fixed speed multi-pump sets with pressure vessels. Several pumps start and stop in sequence, and a pressure vessel limits cycling. These are simpler and cheaper, but give less precise pressure control and use more energy at low demand.
Rooftop tank systems. A booster pump fills an elevated tank on the roof, and water feeds down by gravity. This reduces pump running time and gives some storage on the roof, but adds structural load and may not deliver high pressure to the top floors.
Zoned systems. In tall buildings, separate booster zones serve different floor ranges so that lower floors do not get excessive pressure. Pressure-reducing valves may be used to control pressure in each zone.
Key Components
- Pumps: usually vertical multistage centrifugal pumps, valued for compact size and efficiency, or horizontal end-suction pumps for higher flows.
- Controller: manages pump sequencing, speed, duty rotation, alarms and protection. Modern controllers often include remote monitoring.
- Pressure sensors or transducers: provide feedback for constant pressure control.
- Pressure vessel (diaphragm tank): smooths demand, limits cycling and offers a small reserve of water.
- Isolation and non-return valves: one on each pump for maintenance and to prevent backflow.
- Manifolds: suction and discharge headers that combine the pumps into a single set.
- Break tank or storage tank: with float valves, overflows, vents and level sensors.
- Dry-run protection: low-level float switches, pressure switches or flow sensors.
- Pressure gauges and flow meter: for monitoring and commissioning.
- Anti-vibration mounts and flexible connectors: reduce noise and stress on pipes.
Sizing a Booster System
Step 1: Estimate peak flow. Peak flow is not the sum of all fixtures running at once. Standard methods use fixture units, occupancy, building type and diversity factors. Plumbing design guides, such as those based on fixture-unit methods, convert fixture counts into design flow rate. For estates, estimate by number of dwellings, typical consumption and simultaneous use. Include special loads such as irrigation, cooling towers and fire hose reels where relevant.
Step 2: Calculate required pressure. Required pressure combines:
- Static height: vertical difference between pump centreline and the highest outlet
- Minimum residual pressure at the highest fixture, such as 1.5 to 2 bar
- Friction losses in pipes, valves, meters and fittings at peak flow
- Losses through equipment such as water heaters, filters and backflow preventers
Convert pressure to head (1 bar ≈ 10.2 m) and add the components to find total dynamic head.
Step 3: Choose the pump arrangement. For reliability, most buildings use two or three pumps in parallel, with at least one standby. A common approach is two duty pumps each sized for about 50 to 60 percent of peak flow plus one standby, or n+1 redundancy. Variable speed control allows pumps to share flow efficiently.
Step 4: Check suction conditions. Ensure available NPSH exceeds the pump’s required NPSH, with a margin. Position the tank outlet above the pump if possible for flooded suction, and size suction pipes generously to keep velocity low.
Step 5: Size the pressure vessel. The vessel should limit pump starts, typically to no more than a few per hour for fixed speed pumps, and maintain pressure during low demand. Follow manufacturer sizing charts.
Step 6: Select the controller and protection. Include duty rotation, fault alarms, dry-run protection, over-pressure protection, phase failure protection and communication outputs.
Planning the Pump Room
A good pump room makes installation, operation and maintenance easier.
- Location: keep pumps close to the storage tank to shorten suction pipes, and away from bedrooms and quiet areas to limit noise.
- Size and access: allow clear space around the set for service, with access for removing pumps and motors. Provide lifting points where heavy equipment is involved.
- Ventilation and temperature: motors and drives generate heat. Provide adequate ventilation and avoid very hot rooms.
- Drainage and flood protection: include a floor drain or sump, with a sump pump if below ground level.
- Lighting and power: provide adequate lighting, sockets and a lockable electrical panel.
- Noise control: consider a concrete plinth, vibration isolation and acoustic treatment if the room is near occupied spaces.
- Safety: clear signage, safe access, and protection for moving parts and hot surfaces.
Installation Steps
- Prepare the base. Build a level, rigid concrete plinth or use the manufacturer’s frame. Provide vibration isolators for the set.
- Position the booster set. Place it on the base, check level and secure it according to instructions.
- Connect the suction pipework. Keep it short and straight, with isolation valves and strainers. Slope the pipe slightly upward toward the pump to avoid air pockets. Avoid sudden changes in diameter and use eccentric reducers with the flat side on top.
- Connect the discharge pipework. Fit isolation valves, non-return valves and pressure gauges. Support pipes independently of the pumps so that no weight or thermal stress is transferred to the pump casing.
- Install flexible connectors on suction and discharge to reduce vibration transfer.
- Fit the pressure vessel. Install it on the discharge side, with an isolation valve for maintenance and a drain. Pre-charge the vessel to the pressure recommended by the manufacturer, usually slightly below the pump start pressure.
- Install sensors and controls. Mount the pressure transducer at a stable, representative point on the discharge manifold, and fit low-level protection in the tank or suction line.
- Wire the electrical connections. Use correctly sized cables, protective devices and earthing. Provide a lockable isolator near the set. Surge protection is advisable in lightning-prone areas.
- Fill and vent the system. Fill pumps and pipework slowly, venting air from pump casings and high points. Never run the pumps dry.
- Check rotation and alignment. For three-phase pumps, check direction of rotation. Inspect for leaks and secure all joints.
Commissioning
- Set the pressure setpoint on the controller according to design, adding a margin for pressure fluctuations.
- Configure pump sequencing, duty rotation and standby operation.
- Test dry-run and low-level protection to confirm that pumps stop safely.
- Test at various flow rates by opening fixtures or discharge points, and verify that pressure remains stable.
- Check motor current, voltage and temperature against nameplate values.
- Listen for noise and check for vibration, correcting any unusual behaviour.
- Check pressure at the highest and lowest points of the building and adjust setpoints or pressure-reducing valves if required.
- Record baseline data, including pressures, flow, current and settings.
- Train the facilities team on alarms, manual operation and basic troubleshooting.
Water Quality and Regulatory Considerations
- Backflow prevention: use approved devices to prevent contaminated water from returning to the mains.
- Tank hygiene: keep storage tanks clean, covered and vented with insect screens, and avoid long water residence times that may encourage bacterial growth.
- Materials: use pipes, valves and components approved for potable water.
- Utility rules: check local water authority requirements before connecting a booster directly to the mains.
- Fire systems: fire pumps follow separate standards and must not be combined with domestic boosters unless the design specifically allows it.
Energy Efficiency and Control
Booster sets often run many hours per day, so efficiency pays.
- Variable speed drives reduce energy use at partial load and cut pressure surges.
- Right-sizing avoids pumps working far from best efficiency.
- Correct pressure setpoints matter. Every extra bar of pressure costs energy and increases leakage and wear on fittings.
- Pressure-reducing valves and zoning avoid overpressurising lower floors.
- Efficient motors and well-designed pipework reduce lifetime cost.
- Remote monitoring helps catch problems early and optimise operation.
Common Installation Problems
- Oversized pumps that cycle frequently or run inefficiently.
- Poor suction design, with air leaks, small pipes or tight bends causing cavitation.
- No standby pump in critical buildings.
- Inadequate pressure vessel, leading to short cycling.
- No vibration isolation, transmitting noise through the building structure.
- Incorrect pressure sensor location, causing unstable control.
- No dry-run protection, risking pump damage when tanks run low.
- Excessive pressure on lower floors, causing leaks and damaged fixtures.
- Neglecting pipe supports, straining pump connections.
- Insufficient maintenance access.
Maintenance Tips
- Check pressure, flow and pump current regularly.
- Inspect seals, bearings and couplings for leaks, heat and noise.
- Test standby pumps by rotating duty periodically.
- Check pressure vessel pre-charge at least annually.
- Clean strainers and inspect tank interiors.
- Test protection devices and alarms.
- Keep spare parts such as seals, pressure sensors and fuses on hand.
- Maintain a service logbook.
Conclusion
A good booster pump installation delivers steady, comfortable water pressure throughout a building or estate. Success depends on correct sizing based on peak flow and total dynamic head, a robust arrangement with break tank and standby pumps, careful pump room planning, proper pipework and vibration control, and thorough commissioning. Add sensible pressure control, protection and maintenance, and the system will provide reliable service with low energy cost and minimal fuss for many years.
