
A pump is only as good as its installation. A correctly selected pump that is badly installed will vibrate, overheat, lose efficiency and fail early. A modest pump that is properly sized, aligned and piped can run reliably for decades. Whether you are supplying water to a farm, a building, a factory or a borehole, a sound pump installation follows a clear sequence: understand the duty, choose the right type, size it correctly, install it carefully and commission it with discipline.
This guide gives you the whole picture in one place, with links in concept to the more detailed topics that follow in this series.
What a Pump Actually Does
A pump adds energy to a liquid. That energy lets the liquid move through pipes, climb to a higher level, overcome friction or reach a required pressure. Every pump is defined by two basic outputs:
- Flow rate (Q): the volume of liquid moved per unit time, usually in litres per second, cubic metres per hour or gallons per minute.
- Head (H): the energy added per unit weight of liquid, expressed as an equivalent height of liquid column in metres or feet.
Pressure and head are directly related. For water, 10.2 metres of head is roughly one bar of pressure. Everything in pump design comes back to delivering the required flow at the required head, as efficiently and reliably as possible.
Main Pump Types at a Glance
Pumps fall into two broad families.
Dynamic (kinetic) pumps add velocity to the fluid using a rotating impeller, then convert that velocity into pressure. Centrifugal pumps are the most common example. They suit clean, low-viscosity liquids and deliver smooth, continuous flow.
Positive displacement pumps trap a fixed volume of fluid and force it through the discharge. Piston, diaphragm, gear, screw and progressive cavity pumps belong here. They deliver nearly constant flow regardless of pressure and are well suited to viscous liquids, metering and high-pressure duties.
Within these families, installations also differ by arrangement:
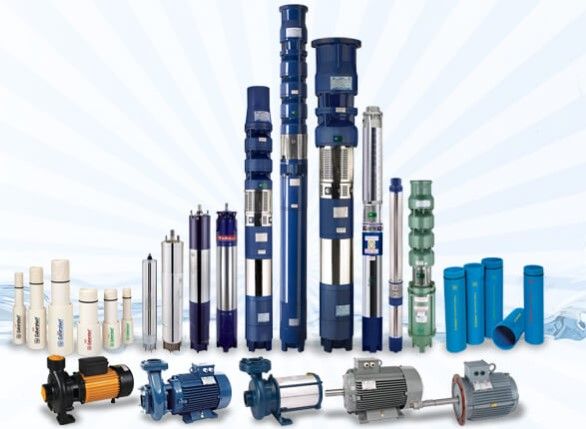
- Surface pumps sit above the liquid and draw it up through suction piping.
- Submersible pumps operate underwater, pushing liquid upward.
- Booster pumps raise pressure in an existing system.
- Borehole pumps are slim submersible or line-shaft pumps designed for deep, narrow wells.
Later articles in this series explore each type in detail. For now, remember that choosing the wrong family for the duty is the most expensive mistake in the whole project.
Step 1: Define the Duty Clearly
Before looking at any catalogue, write down the duty. A good duty statement includes:
- Liquid properties: clean water, raw water, wastewater, chemicals, temperature, density, viscosity, solids content and corrosiveness.
- Required flow rate: the peak demand and the typical demand.
- Required head: static lift, pressure requirement and friction losses.
- Operating pattern: continuous, intermittent, variable or seasonal.
- Power source: grid, generator, solar or hybrid, including voltage and phase.
- Site constraints: space, noise, ventilation, flooding risk, access for maintenance and ambient temperature.
Many installation problems start with a vague brief. A pump selected for “about 10 cubic metres per hour” without defining the head will almost certainly operate in the wrong place on its curve.
Step 2: Size the System
Sizing means determining the flow rate and total dynamic head (TDH), then selecting a pump whose best-efficiency point sits close to that duty.
Flow rate. Calculate demand from the application: irrigation area and crop needs, building occupancy and fixture units, livestock numbers or process requirements. Add a sensible allowance for future growth, but avoid heavy oversizing.
Total dynamic head. TDH is the sum of static head (the vertical lift), friction losses in pipes and fittings, and the pressure required at the delivery point. It is the key number for pump selection, and a separate article in this series explains how to calculate it step by step.
Duty point and pump curve. Plot the system curve against the pump curve. Their intersection is the actual operating point. The ideal choice has that point near the pump’s best efficiency point (BEP), usually within roughly 70 to 110 percent of BEP flow. Operating far from BEP wastes energy and shortens bearing, seal and impeller life.
Suction conditions. For surface pumps, check available net positive suction head (NPSH) against the pump’s required NPSH to avoid cavitation. This is especially important where water is hot, suction lifts are high or altitude reduces atmospheric pressure.
Motor and power. Select a motor with adequate margin above the pump’s absorbed power at the duty point, and check starting method, cooling and protection requirements.
Step 3: Choose the Right Pump and Materials
Match the pump to the liquid and duty:
- Clean water supply and boosting: multistage or end-suction centrifugal pumps.
- Deep boreholes: multistage submersible pumps or line-shaft turbines.
- Dirty water and wastewater: non-clog or solids-handling submersible pumps.
- Viscous or metered flows: positive displacement pumps.
- Chemical or abrasive liquids: corrosion-resistant materials, special seals or diaphragm designs.
Materials matter. Cast iron suits clean, neutral water. Stainless steel resists corrosion in aggressive or saline conditions. Bronze, duplex steel and engineered plastics each have a place. Seal type, bearing arrangement and elastomer compatibility should also be checked against the liquid.
Step 4: Plan the Installation Layout
A well-designed layout makes the pump easier to run and maintain.
Location. Place the pump as close to the source as practical for surface pumps, to minimise suction lift and pipe length. Provide shelter from sun, rain and flooding, and leave clear access for inspection and removal.
Foundation. A rigid, level concrete base, typically several times the weight of the pump and motor, absorbs vibration and keeps the equipment aligned. Grout the baseplate properly where specified.
Suction piping. Keep it short, straight and at least as large as the pump suction nozzle. Slope pipes upward toward the pump to avoid air pockets. Avoid elbows right at the inlet, use eccentric reducers with the flat side up, and prevent air leaks at every joint.
Discharge piping. Include a non-return (check) valve and an isolation valve. Provide pressure gauges, and consider surge protection where long pipelines or fast valve closure may cause water hammer.
Pipe supports. Pipes should be supported independently so that their weight and thermal movement do not stress the pump casing.
Electrical supply. Use correctly sized cables, protection devices, starters or variable speed drives, and proper earthing. Provide a local isolator within sight of the pump.
Step 5: Install Carefully
Good workmanship delivers the reliability promised on the datasheet.
- Inspect equipment on arrival. Check for transport damage, confirm nameplate data and rotate the shaft by hand.
- Set the baseplate on the foundation, level it and grout it.
- Align the pump and motor. Misalignment is a leading cause of bearing and seal failure. Use dial indicators or laser tools and follow manufacturer tolerances. Recheck after pipework is connected.
- Connect piping without strain. Pipework should line up naturally with the pump flanges. Never pull misaligned pipes into place with the flange bolts.
- Install instrumentation. Fit pressure gauges on suction and discharge, and flow meters where possible. These tools make performance monitoring and troubleshooting much easier.
- Prime the pump. Centrifugal pumps must be filled with liquid before starting. Running dry can destroy mechanical seals within seconds.
- Check rotation direction before coupling or running under load, especially for three-phase motors.
For submersible and borehole pumps, additional steps apply, such as cable protection, riser pipe supports and safe lowering procedures. These are covered in the borehole installation article.
Step 6: Commission with Discipline
Commissioning is where you prove that the pump performs as designed.
- Open suction valves fully and discharge valves slightly before starting.
- Start the pump and gradually open the discharge valve to reach the duty point.
- Check for abnormal noise, vibration, leaks and heating.
- Record flow, pressure, current, voltage and temperature.
- Compare readings with the pump curve and design duty.
- Verify protection devices, such as dry-run protection, overload relays and pressure switches.
- Document baseline vibration, current and pressure for future comparison.
These baseline records are invaluable. Gradual drift away from them is often the first sign of wear, blockage or developing faults.
Best Practice for Reliability and Efficiency
Avoid oversizing. An oversized pump runs away from its best efficiency point, consumes more energy and often cavitates or vibrates. Throttling a large pump with a valve is wasteful. Variable speed drives often offer a better way to match flow to demand.
Protect against dry running. Fit level sensors, flow switches or motor current monitoring where the water source may run low.
Control water hammer. Use slow-closing valves, surge vessels or soft-start devices where needed.
Keep suction clean. Use strainers or intake screens, and keep sumps free of silt and debris.
Plan for maintenance. Provide lifting points, isolation valves, spare parts and clear service procedures. Keep a logbook of inspections, repairs and operating hours.
Consider the whole life cost. Energy typically represents the largest share of a pump’s lifetime cost, far greater than purchase price. Efficient pumps and well-designed pipework often pay back quickly.
Common Installation Mistakes
- Wrongly sized pumps selected from vague or incorrect duty data.
- Air leaks and poor suction layout that cause cavitation and loss of prime.
- Misalignment between pump and motor.
- Pipe strain transferred to pump flanges.
- No check valve or isolation valves, making maintenance difficult and risking reverse flow.
- Undersized cables and poor electrical protection.
- Ignoring NPSH, especially with hot liquids or high suction lifts.
- Skipping commissioning records, leaving no baseline for future diagnosis.
Conclusion
A successful pump installation is the result of good decisions at every stage. Define the duty, calculate flow and head carefully, choose the right type and materials, lay out the system with proper suction and discharge arrangements, install with precision, and commission with measurements you can trust. Follow these steps and your pump will run close to its best efficiency point, use less energy, need less maintenance and last far longer. The rest of this series explores each stage in more depth so that you can install pumps with confidence.
